
Quick Start Guide - Rons Markdown Edit
This guide will help you get started with Rons Markdown Edit in a few minutes. You will open your first document, apply common Markdown formatting, preview the result as HTML, and learn where to find search, replace, and spelling tools as your files grow.
A free Lite version is available if you want to follow along on your own machine.
1. Open or Create a Document
Rons
Markdown Edit works with plain Markdown files (typically .md or
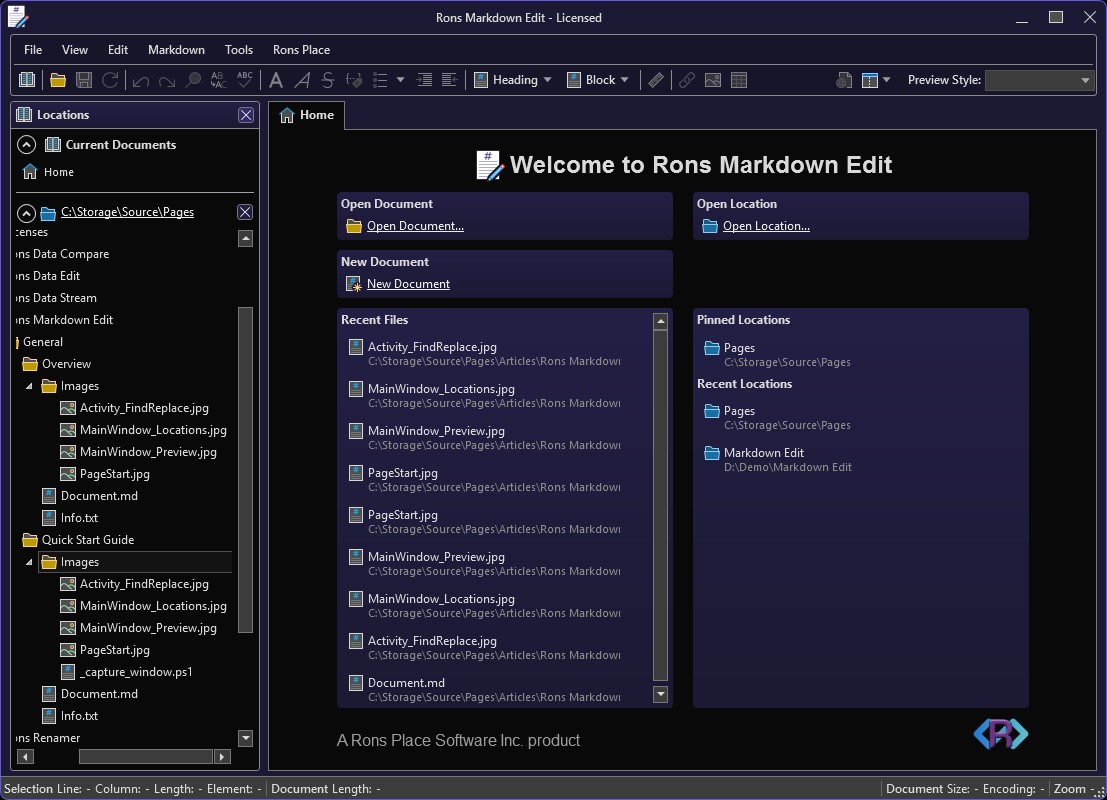
.markdown). When the application starts, the Start Page
offers the usual starting points:
- Open Document... — pick an existing Markdown file from disk.
- New Document — start from an empty tab; save when you are ready.
- Open Location... — open a folder so you can browse and double-click files in the Locations panel.
The Start Page also lists Pinned Files, Recent Files, and Recent Locations so you can return to ongoing work quickly.
From the menu bar, File repeats these actions and adds Recent Files and Recent Locations when you already have the main window open.
2. Understand the Main Window
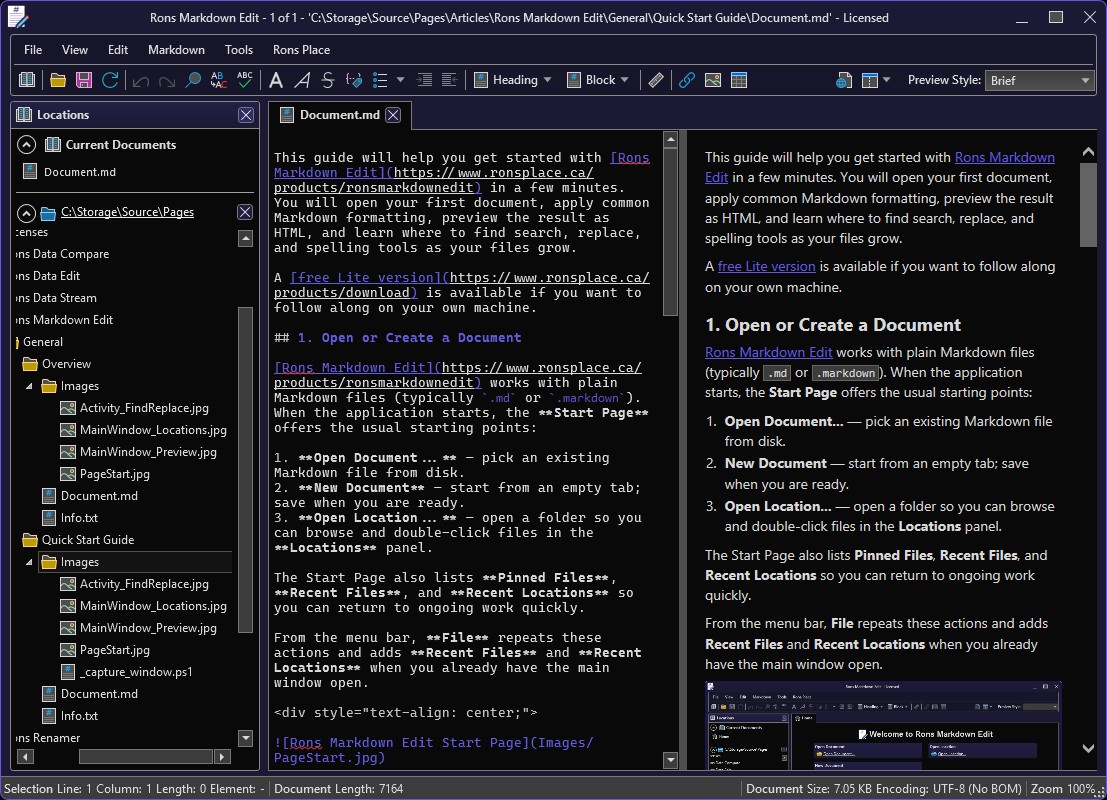
Once a document is open, the window is organised around a few familiar areas:
- Document tabs — several Markdown files can stay open at once; use View menu commands or the tab strip to switch between them.
- Text editor — the Markdown source; line numbers, line wrap, and visible whitespace are toggles under View.
- Toolbar — quick access to save, undo, find, replace, spelling, common Markdown commands, and HTML preview.
- Locations (left) — folder tree for the location you opened; Current Documents lists every open tab.
- Detail panel (right) — Document Properties (encoding, line endings, paths) and the Command List (searchable shortcuts).
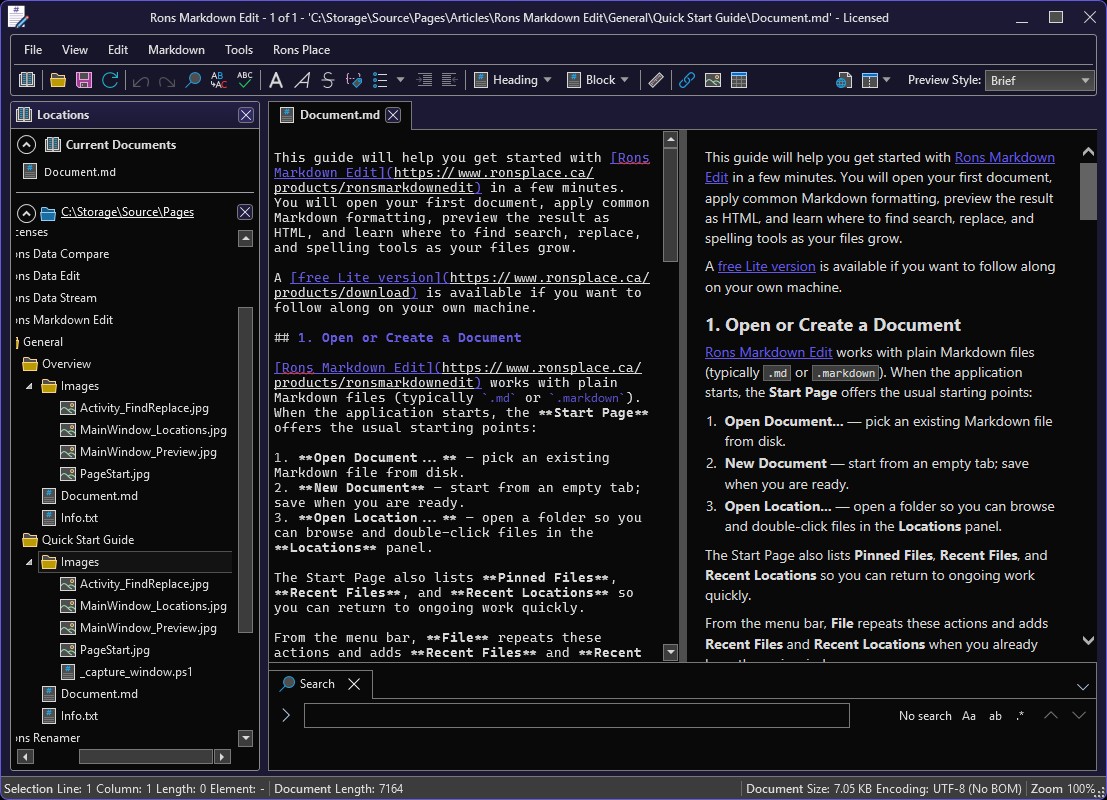
- Activity panel (bottom) — Find / Replace and Spelling when you open those tools.
If you prefer keyboard-driven work, open Tools → Edit Commands to review or change shortcuts.
3. Write and Format Markdown
You can type Markdown by hand or use the application’s formatting commands, which insert or adjust the syntax for you.
Use the Markdown menu or the formatting buttons on the toolbar for everyday structure:
- Bold, Italic, Strikethrough, and inline Code
- Headings (levels 1–6)
- Bulleted, Numbered, and Task lists, with Indent and Outdent
- Quote blocks and Code Block sections
- Horizontal Rule
- Link, Image, and Table — these open dedicated editors so you can set URLs, alt text, and table layout without guessing the syntax
The editor’s context menu (right-click in the text) offers the same Markdown submenu, plus Paste as Markdown when the clipboard holds HTML from a browser or another application.
Under Edit, Format tidies the current selection, and Format Convert rewrites the document through HTML — useful when pasted content arrived with messy markup.
4. Preview as HTML
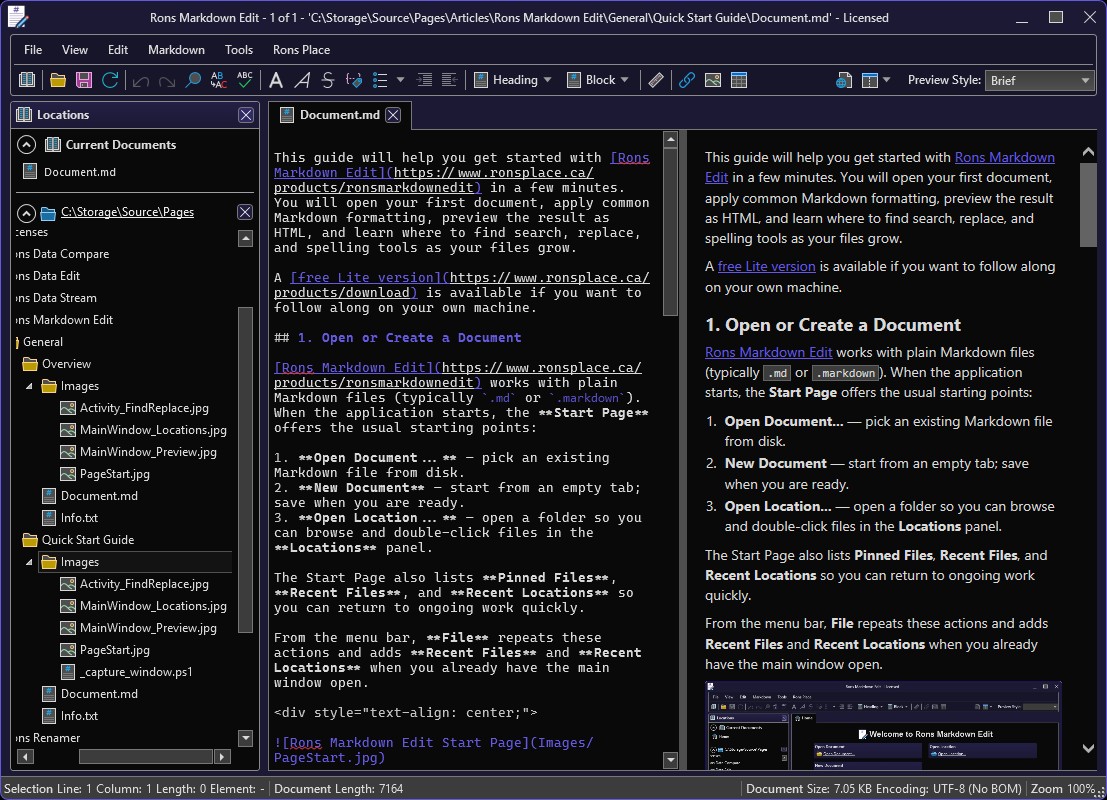
Markdown is the source of truth; the preview shows roughly how the rendered HTML will look.
- Click HTML Preview on the toolbar, or use View → HTML Preview.
- Choose Vertical Split (side by side) or Horizontal Split (editor above, preview below) from View or the split button next to the preview control.
- Pick a Preview Style from the drop-down on the toolbar to change the HTML theme (for example GitHub-style or simpler layouts).
The preview updates as you edit. You can copy from the preview using the normal Copy command where selection is supported.
5. Work with a Folder (Location)
Longer writing projects rarely involve a single file in isolation.
- Choose File → Open Location... (or Open Location... on the Start Page).
- Select the folder that contains your notes, docs, or site source.
-
In Locations, expand folders and double-click a
.mdfile to open it in a new tab.
From the location tree’s context menu you can create folders or new documents, rename items, refresh the tree, copy paths, or reveal a folder in Windows Explorer — without leaving the editor.
Pinned locations on the Start Page are a convenient way to keep a documentation repo one click away.
6. Find, Replace, and Spelling
For a single file:
- Edit → Find or Replace... opens the Activity panel at the bottom with search options.
- Edit → Spelling lists issues in the same panel; click an entry to jump in the document.
- Tools → Enable Background Spell Check underlines mistakes while you type (toggle again to turn it off).
Use the toolbar buttons for Find and Spelling if you prefer icons to menus.
7. Save and Document Properties
- Save and Save As... are on the File menu and toolbar.
- File → Refresh reloads the file from disk if it changed outside the editor (useful when another tool touched the same file).
- File → Document Properties (or the detail panel) shows encoding, line separator settings, and path information — adjust encoding here if characters do not look right after opening a file from elsewhere.
Before sharing a file with systems that expect UTF-8, confirm encoding in Document Properties or set defaults under Tools → Options.
8. Images and Supporting Files
Opening an image file from a Location shows a dedicated Image tab with basic viewing and properties — handy when your Markdown folder includes figures or screenshots referenced from your text.
For images inside Markdown, use Markdown → Image (or the toolbar) so the link and alt text are written consistently.
What's Next?
You now have enough to draft, preview, and maintain Markdown files in a project folder. For a broader tour of the application, see the Overview of Rons Markdown Edit.
As you go further:
- Explore Tools → Options for appearance (light/dark), editor font, format defaults, and network settings.
- Customise shortcuts in Tools → Edit Commands.
- Visit the Rons Markdown Edit product page for downloads, licensing, and feature updates.
If you have questions or documentation suggestions, contact us. We are always interested in feedback from people who live in Markdown day to day.
Related Information
Rons Markdown Edit
General


